Don't Go Live Blind: 10 Pre-Stream Checks Every Broadcaster Needs to Run
Photo: Unknown, CC BY-SA 3.0, via Wikimedia Commons
You've spent weeks planning your show. The topic is dialed in, the thumbnail looks sharp, and you've told everyone you know to tune in at 7 PM. Then you go live — and your microphone is muted, your camera is showing a black screen, and your chat is flooding with "can't hear you" messages.
It happens to creators every single day. And almost every time, it was completely preventable.
At WebcastPilot, we believe that a great live show starts long before you ever press record. The difference between a polished broadcast and an embarrassing meltdown usually comes down to one thing: preparation. So we put together this no-fluff, ten-point technical checklist you should run through before every stream — especially your very first one.
1. Test Your Internet Upload Speed (Not Just Download)
Most people check their internet speed and see a big download number — and assume they're good. Wrong. Live streaming runs on upload bandwidth, and that's the number that matters.
For a solid 1080p stream, you'll want at least 6–10 Mbps of stable upload speed. Go to a site like Speedtest.net and run the test a few times over 15–20 minutes to check for consistency. Spikes and drops are more dangerous than a lower average, because they're what cause that dreaded buffering wheel.
Pro tip: Run this test from the same room and device you'll be streaming from. WiFi performance varies a lot depending on where you're sitting.
2. Wire In When You Can
WiFi is convenient, but it's also unpredictable. A wired ethernet connection is always going to give you more stability than wireless — and stability is everything in live broadcasting. If your streaming setup is near your router, grab a Cat6 cable and plug in directly. Your viewers will never know the difference, but your dropped frame count will.
3. Set Up a Backup Connection
Even wired connections can go down. Your ISP can hiccup at the worst possible moment. Before you go live, have a backup plan ready. A mobile hotspot from your phone is the easiest option — just make sure you've tested it ahead of time and know how to switch your streaming software over to it quickly. Some creators keep a dedicated hotspot device just for this reason.
4. Do a Full Audio Check — With Headphones
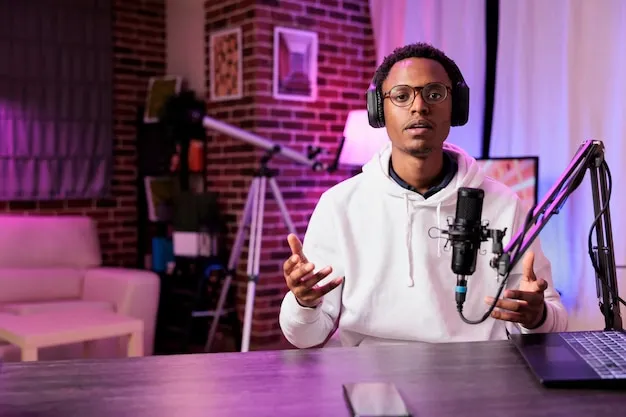
Audio is the single most important technical element of any webcast. Viewers will tolerate a slightly blurry video feed, but bad audio drives people away in seconds.
Plug in your headphones and listen back to a test recording. Check for background hum, echo, clipping (that harsh distortion when you speak too loud), and room reverb. Make sure your microphone levels are peaking somewhere around -12 to -6 dB — not maxed out, not barely registering. Also confirm you're recording from the right input device. It's shockingly easy to accidentally stream through your laptop's built-in mic instead of the external one you bought.
5. Verify Your Video Feed and Framing
Open your streaming software and look at your camera preview. Is the image clear and well-lit? Is your face actually in the frame, or are you showing mostly ceiling? Check your white balance if your camera allows it — warm, orange-toned lighting looks unprofessional and is easy to fix with a quick setting adjustment.
Also confirm your resolution and frame rate settings match what your platform expects. Mismatched settings can cause encoding issues that you won't notice until your stream is already live.
6. Run a Full Encoder Settings Check
Whether you're using OBS, Streamlabs, or another piece of software, take five minutes to walk through your encoder settings before every show. Confirm your bitrate, resolution, frame rate, and keyframe interval are all set correctly for your destination platform. A lot of technical problems during live streams trace back to encoder settings that got accidentally changed.
7. Test Your Stream Key and Platform Connection
This one sounds basic, but it catches people off guard more than you'd think. Do a private test stream — most platforms let you go live in an unlisted or test mode — and confirm that your stream is actually reaching the platform before your audience shows up. Verify the stream key is current (platforms occasionally reset them), and make sure your software is pointed at the right RTMP server.
8. Check Your Chat and Interaction Tools
If audience engagement is part of your show — and it should be — you need to test your chat functionality before going live. Open your chat window, have a friend send a test message, and make sure you can see and respond to it. If you're using a chat overlay or moderation bot, test that too. Nothing's more awkward than asking your audience questions and then realizing you can't see any of their responses.
9. Do a Dry Run From Start to Finish
This is the one step most new creators skip — and the one that pays off the most. At least once before your debut stream, run a full dress rehearsal. Go through your intro, your transitions, your screen shares, your outro — everything. Record it locally and watch it back. You'll catch problems you'd never notice in the moment, from a distracting background noise to a segment that runs way too long.
10. Prep Your Emergency Contacts and Contingency Plan
What happens if something goes wrong mid-stream? Know in advance. Have the platform's support page bookmarked. Have a co-host or moderator who can communicate with your audience if you need to restart. Draft a quick message you can post to social media if you experience technical difficulties. Experienced broadcasters aren't the ones who never have problems — they're the ones who handle problems without falling apart.
Launch Ready, Not Just Live
There's a big difference between being technically live and being broadcast ready. Any creator can hit a button and start pushing a signal. But the streamers who build loyal audiences are the ones who treat every show — especially the first one — as a professional production.
Running through this checklist won't take more than an hour, and it could save you from the kind of on-air disaster that takes weeks to recover from in terms of audience trust. So before your next stream, slow down, run the checks, and launch with confidence.
You've got a show to run. Make sure your tech is ready to run it with you.